TDS deduction and TCS collection is an important obligation for all Deductors and Collectors. However, if any mistake exists in the return, then revised or corrections are the only option to rectify the mistakes by using the consolidated file available on the portal.
In this blog, we will discuss how to file TDS Correction Statement through Web-e-TDS, Webtel’s TDS correction utility.
Step 1: Open Web-e-TDS and click on ‘Revised Return’ option on the menu.

Step 2: On clicking ‘Revised Return’ a new screen will appear. Here click on ‘Import Consolidated File’ option.

Step 3: Now you can select the consolidated file from the given location and the data would be imported to the software. On successful completion of data import, the following message would appear.

Step 4: A ‘Company Master’ will be created related to the consolidated file. Here, you are required to enter the ‘Username’ and ‘Password’ and click on ‘Save’ button to save the changes.

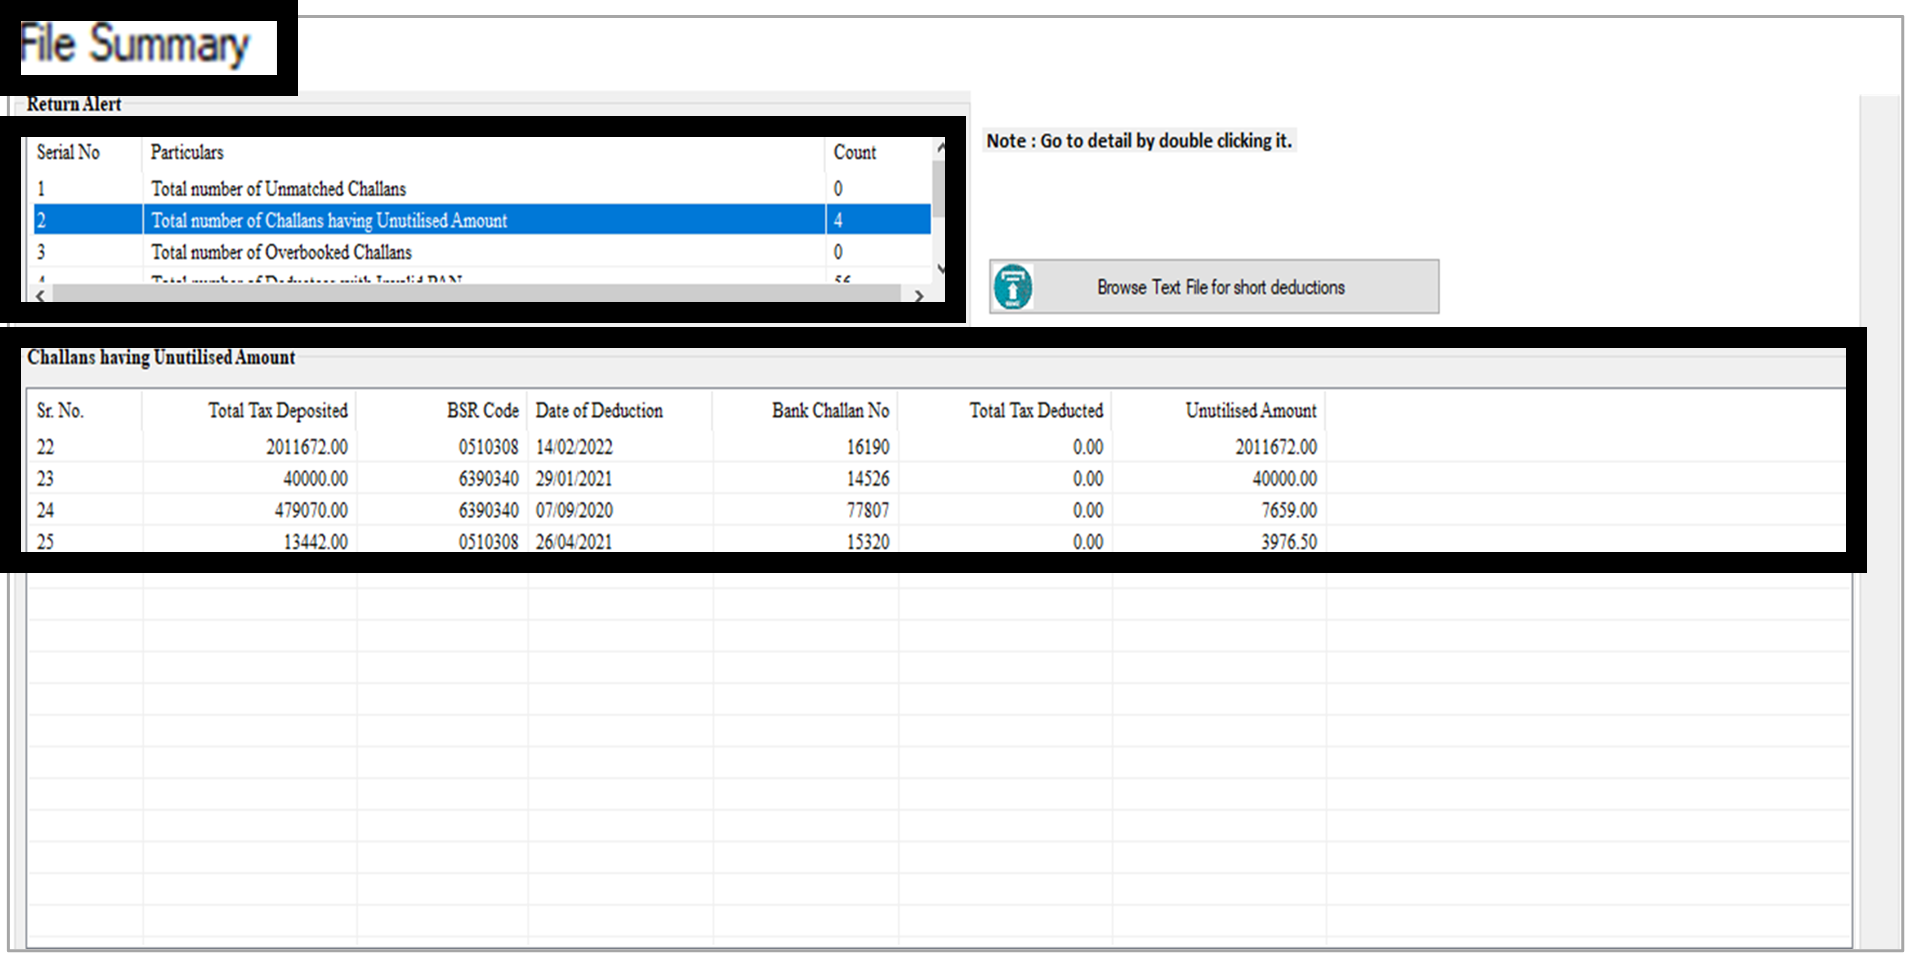
Step 5: Once you have saved the Company Master, the following screen will appear for filing ‘Revised Return’, with the option for ‘File Summary’, ‘Deductor Details’, ‘Challan Details’, and ‘Deductee Details’.

Step 6: In case you want to check the summary, select the ‘File Summary’ Tab, the following screen will appear with details of the challan. Here you can see the total number of challans, the number of challans having unutilized amounts, the total number of deductees with invalid PANs, and so on.
If you want to check a particular data, double-click on the head and the details will appear in the file summary.
Changing the Deductor Details,
Step 7: To change deductor details, go back to the previous window and select ‘Deductor Details’ option, the following window will open. Here you will be able to change all details except the deductor’s TAN number. Simply click on the type of change and select ‘Modify without TAN’ and you will be able to make the desired changes.

Changing the Deductor Details,
Step 8: If you want to edit challan details, click on the ‘edit’ option and make the desired changes. The edited challan details will appear in yellow so that you can track down the changes made.

Adding the Deductee Details
Step 9: To make any additions to the deductee details, you need to go back to the ‘deductee details’ tab and right-click on the entry. Now, you can add the required details by selecting the ‘add’ option.

Step 10: The following window will appear. Here, you add new deductee details. Fill in the Name and PAN Number of the deductee along with the challan against which you want to tag the details, along with all the other details.
Note that only challans with available balance can be selected when making new entries in deductee details.

Once the details have been added, click on ‘OK’ and the details will be added on the bottom of the Deductee Details.
Adding the Deductee Details
Step 11: To make changes to existing deductee details, go back to the ‘deductee details’ tab, select the party, right-click, and select ‘edit’. The following window will open. In this window, you can modify the desired changes and click ‘OK’ to save these changes.
The edited entry will be highlighted in yellow color.

Marking Deductee details as zero
Step 12: To delete the wrong entry or mark the deductee amount as zero, go to the ‘deductee details’ tab and right-click on the desired entry. Select the ‘Mark Deductee Amt as Zero’, the amount of the payment rate, and the TDS deducted column will be marked as zero, i.e. the entry will be nullified/deleted.

Editing PAN Details
Step 13: To make changes to the PAN details of a deductee, go to the ‘Deductee Details’ tab, right-click the party details and choose the ‘PAN Edit’ option.
A screen will appear where you can edit the entries in which the PAN number is not correct. Note that only two Alphas and two Numeric values can be changed using the ‘Edit PAN’ option. After making changes, click ‘OK’ to save the entry.

Step 14: After making all the necessary changes, click on the ‘Save’ option, a screen will appear where you can add any remarks, and click ‘ok’. A message box will appear on successful completion of data saving process.

Step 15: Now select the ‘validate’ option, the following screen will appear. Here, any errors in the entries will be reflected. In case there are no errors, a message for successful validation will appear.

Step 16: On successful validation, select the ‘generate’ option, enter the required details, and click ‘OK’, the files will be auto-validated by the utility.

Step 17: Once the validation process is complete, the following window will appear.

This is the complete process of filing Revised TDS Return using Web-e-TDS.
If you have any doubts or queries, drop them in the comment section below. You can also reach out to us at +91 7303393220